Category Archives: HTML5

Building a 60FPS WebGL Game on Mobile

winter-rush-740

Last year I was invited to contribute to the Christmas Experiments website. This site features cutting-edge web experiments by some of the top names in interactive web development. Since WebGL now runs everywhere* I figured I would try to build a game that runs well on mobile devices.

In order to effectively use the few days I had available, I decided to to create a simple ‘endless runner’ in the style of ‘Flappy Bird’ and ‘Temple Run’. For this experiment my objective was to build a playable game that runs at close to 60FPS on mobile.
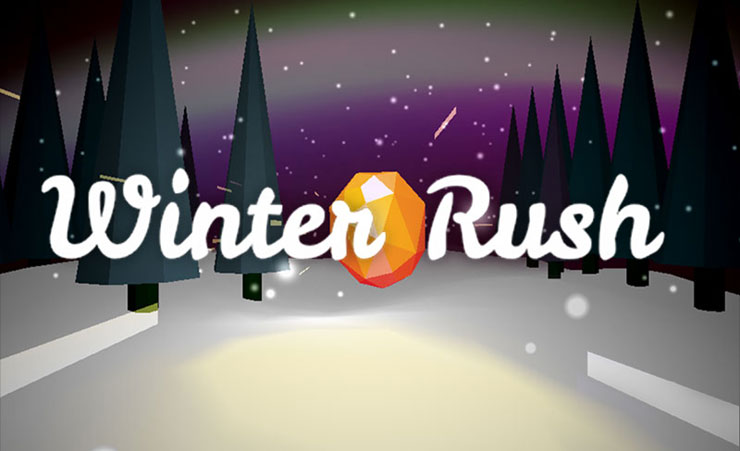
This post will discuss some techniques to get WebGL content running at 60FPS on mobile. We will be using three.js in the code examples.

Why is 60 FPS Important?

The higher the frame rate, the smoother your content will be. Stutter and lag kills the brain’s flow state. For a game it is especially important that motion is smooth and controls are responsive. Computer screens typically refresh at 60Hz, so this is the maximum bound we aim for. Note that 60FPS is the ideal target, but anything above 30FPS will still look pretty good. Paul Lewis has talked extensively about making websites ‘jank free’ and there are lots of great resources here.

Here is a video of Winter Rush pushing 60FPS on an iPad 4th Gen and a Nexus 4:

A video posted by Felix Turner (@felixturner) on


To achieve the FPS target I used the following techniques:

Simplify the 3D Scene

Geometry: Simplify scene geometry by reducing the number of meshes and the vertex count of each mesh. Remember that ‘low poly’ is cool. In this game the trees are simply 2 cylinders: one for the leaves and one for the trunk. There are only 10 trees on the track that are re-positioned as the track moves.

Materials: A big part of a 3D engine cost is in calculating lighting for each face in the scene. The less lights in the scene the better. Three.js materials can be ordered from cheap to expensive like this:

  1. Basic. This is the cheapest material. No lighting calculations are required. You can do a lot with basic materials and image textures.
  2. Lambert. Gives a non-shiny appearance.
  3. Phong. Gives a shiny appearance. In my tests Phong proved to be significantly more expensive than Lambert. For this demo, switching Lambert materials to Phong drops the FPS from 60 to 15 on iOS.

Reuse Objects

This is probably the most important rule for performant web experiences. After object creation on initialization, no new objects should be created during the run of the game. This avoids memory thrashing which causes the browser to choke. Here is a good article on using JS object pools. In Winter Rush we reuse 3D objects (e.g. trees) by resetting their position when they go behind the camera. On every frame, we check if the object is behind camera. If so, we reset its position to be further down the track. We use a THREE.Fog to obscure the trees as they pop in.

MOVING THE TRACK

The snowy floor of the track is a flat plane mesh. We use Perlin noise to generate the height of the terrain (e.g. the Y-coordinates of the vertices). This gives a random but smoothly changing set of bumps. To give the appearance of a seamlessly moving track we use the following technique:

    1. Each frame we move the entire floor toward the camera by a small amount based on the speed of the player.
    2. We check if the floor has moved behind the camera beyond a predefined STRIP_WIDTH amount. If it has, we reset the floor back up the track by the STRIP_WIDTH. We then recalculate the terrain heights by incrementing the Perlin noise position to be equal to the STRIP_WIDTH.

See this in action in this video:

A video posted by Felix Turner (@felixturner) on

Simple Collision Detection

You can do accurate per-face collision detection in Three.js using Raycasters. Lee Stemkoski has a good example here. However this method can be expensive and must be performed for every pair of objects that may collide. In many cases you can simplify collision detection by assuming each object is a sphere and simply measuring the distance between objects.

Note that you may need to manually tweak collision distances and hitbox locations to give a more playable feel. At one point there was an issue where the player could hit objects that were off camera when strafing. The solution was to move the player hitbox out in front of the camera a little. Thanks to @neurofuzzy for the tip.
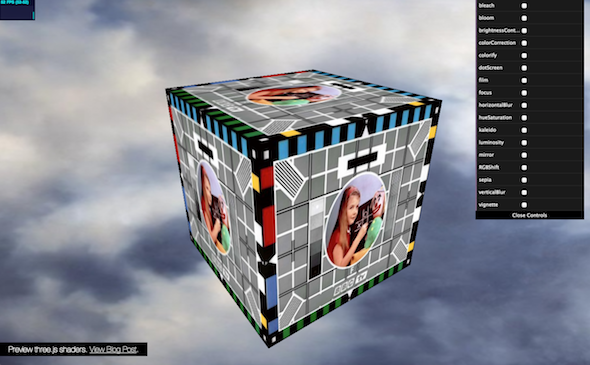
Combine Shaders

In Three.js the EffectComposer allows you to chain multiple post-processing shaders. This approach requires multiple off screen buffers to pass the result of each shader to the next. This can give bad performance on mobile. The solution is to combine your Shaders into a ‘SuperShader’. This is mostly a matter of copy and pasting the shader code and putting them in the correct sequence. For Winter Rush we combine the Vignette, Brightness/Contrast and Hue/Saturation shaders into one. Also note that some effects are just too GPU heavy for mobile, most notably blurring.

Use Clock Delta

For animation loops we should use Request Animation Frame and the clock delta for animation. This make animation speeds independent of framerate. Travel distances should depend on the actual time that has passed rather than the number of frames. This technique won’t improve your FPS but will improve player’s perception of speed if the FPS does drop.

//kick off animation
var clock = new THREE.Clock();
clock.start();
gameLoop();

function gameLoop(){
    requestAnimationFrame(gameLoop );
    var delta = clock.getDelta();
    //use delta to determine all distances travelled
    movePlayer(MOVE_SPEED * delta);
}

Test on Target Devices

Once you have picked your target devices, continually test on those devices and keep an eye on the FPS. The iOS Simulator for OS X is a great tool for debugging iOS issues on the desktop, but be aware that the simulator does not reflect the performance of the actual devices. Adobe Edge Inspect is another great tool which allows you to easily connect multiple mobile devices to a local webpage. It will automatically reload the page when the page changes and also allows you to access Android console errors.

Good JS Libraries for Mobile Dev

These are all great libs for mobile development:

  • Three.js – goes without saying 🙂
  •  Zepto.js – a fantastic jQuery replacement that is much smaller (25k) and faster on mobile.
  • Howler.js – a great little audio library that handles multiple mobile x-platform issues (such as the iOS click to play sounds issue)
  • TweenLite – make tweening easy. Works well on mobile.

Which Devices Can Run WebGL?

WebGL device support is growing fast. In addition to running on all major desktop browsers, WebGL content now runs on iOS and Android devices.

However not all WebGL capable devices are born equal. WebGL is a demanding technology and older devices will have a hard time running anything but the most basic content. For example, the iPad 2 which came out in 2011 will run WebGL but it’s power is very limited. WebGL typically runs well on mobile devices built in the last 2 years. My primary mobile test devices are an iPad 4th Gen (from 2013) and a Nexus 4 (from 2012) which give a pretty good baseline.

To Do

When I get some more free time I would like to add the following to this project:

  • Tilt controls on mobile . I went with tap to move on mobile since it more closly matches the desktop experience. Using the tilt accelerometer is whole different control system.
  • Fancier Desktop version. Since this game is built to run well on slower devices I had to forego fancier effects and geometry. It would be nice to add a desktop version with richer graphics.
  • Use the Android fullscreen API
  • Move the HTML menu overlay into WebGL and perhaps add some nice shader wobble transitions.

Conclusion

Hopefully these tips will help you build performant WebGL content for mobile. Thanks for reading and let me know your high score in the comments 🙂

Intro to Pixel Shaders in Three.js

8231596784_dc2f2d935d_b

I recently started playing with shaders in three.js and I wanted to share some of what I’ve discovered so far. Shaders are the ‘secret sauce’ of modern graphics programming and understanding them gives you a lot of extra graphical fire-power.

For me the big obstacle to learning shaders was the lack of documentation or simple examples, so hopefully this post will be useful to others starting out. This post will focus on using pixel shaders to add post-processing effects to Three.js scenes. This post assumes you already know the basics of using Three.js.

What is a Shader?

A Shader is a piece of code that runs directly on the GPU. Most modern devices have powerful GPUs designed to handle graphics effects without taxing the CPU. This means you get a lot of graphical power essentially for free.

The big conceptual shift when considering shaders is that they run in parallel. Instead of looping sequentially through each pixel one-by-one, shaders are applied to each pixel simultaneously, thus taking advantage of the parallel architecture of the GPU.

There are 2 main types of shaders – vertex shaders and pixel shaders.

  • Vertex Shaders generate or modify 3D geometry by manipulating its vertices. A good example is this fireball where the vertex positions of a sphere geometry are deformed by perlin noise.
  • Pixel Shaders (or ‘Fragment Shaders’) modify or draw the pixels in a scene. They are used to render a 3D scene into pixels (rasterization), and also typically used to add lighting and other effects to a 3D scene.

There are 2 different kinds of pixel shaders –

  • Shaders that draw an image or texture directly. These allows you to draw the kind of  abstract patterns seen on glsl.heroku.com. These types of shaders can be loaded into a THREE.ShaderMaterial to give cool textures to 3D objects like this example.
  • Shaders that modify another image or texture. These allow you to do post-processing on an existing texture, for example to add a glow or blur to a 3D scene. This second type of shader is what we will be talking about for the remainder of this post.

Pixel Shaders in Three.js

Three.js has an effects manager called EffectsComposer and many useful shaders built in. This code is not compiled into the main Three.js file, rather it is maintained separately in 2 folders in the three.js root folder:

  • /examples/js/postprocessing – contains the main EffectsComposer() class, and a number of ShaderPasses.
  • /examples/js/shaders – contains multiple individual shaders.

Unfortunately these shaders are not very well documented, so you need to dig in and test them out yourself.

Preview some of the three.js built-in shaders with this demo.

preview

Applying Shaders in Three.js

Applying a shader is pretty straight-forward. This example applies a dot screen and RGB shift effect to a simple 3D scene:

To use shaders that come with three.js, first we need to include the required shader JS files. Then in the scene initialization we set up the effect chain:

// postprocessing
composer = new THREE.EffectComposer( renderer );
composer.addPass( new THREE.RenderPass( scene, camera ) );

var dotScreenEffect = new THREE.ShaderPass( THREE.DotScreenShader );
dotScreenEffect.uniforms[ 'scale' ].value = 4;
composer.addPass( dotScreenEffect );

var rgbEffect = new THREE.ShaderPass( THREE.RGBShiftShader );
rgbEffect.uniforms[ 'amount' ].value = 0.0015;
rgbEffect.renderToScreen = true;
composer.addPass( rgbEffect );

First we create an EffectComposer() instance. The effect composer is used to chain together multiple shader passes by calling addPass(). Each Shader Pass applies a different effect to the scene. Order is important as each pass effects the output of the pass before. The first pass is typically the RenderPass(), which renders the 3D scene into the effect chain.

To create a shader pass we either create a ShaderPass() passing in a shader from the ‘shaders’ folder, or we can use some of the pre-built passes from the ‘postprocessing’ folder, such as BloomPass. Each Shader has a number of uniforms which are the input parameters to the shader and define the appearance of the pass. A uniform can be updated every frame, however it remains uniform across all the pixels in the pass. Browse which uniforms are available by viewing the shader JS file.

The last pass in the composer chain needs to be set to to renderToScreen. Then in the render loop, instead of calling renderer.render() you call composer.render()

That’s all you need to apply existing effects. If you want to build your own effects, continue.

GLSL Syntax

WebGL shaders are written in GLSL. The best intro to GLSL syntax I found is at Toby Schachman’s Pixel Shaders interactive tutorial. Go thru this quick tutorial first and you should get a lightbulb appearing over your head. Next take a look at the examples in his example gallery. You can live edit the code to see changes.

GLSL is written in C so get out your ‘Kernighan and Ritchie’ :). Luckily a little code goes a long way so you won’t need to write anything too verbose. The main WebGL language docs are the GLSL ES Reference Pages, which lists all the available functions.  GLSL Data Types are described here. Usually Googling ‘GLSL’ and your query will give you good results.

Some GLSL Notes:

  • Floats always need a number after the decimal point so 1 is written as 1.0
  • GLSL has many useful utility functions built in such as mix() for linear interpolation and clamp() to constrain a value.
  • GLSL allows access to components of vectors using the letters x,y,z,w and r,g,b,a. So for a 2D coordinate vec2 you can use pos.x, pos.y. For a vec4 color you can use col.r, col.g,col.b,col.a
  • Most GLSL functions can handle with multiple input types e.g. float, vec2, vec3 and vec4.
  • Debugging GLSL is notoriously difficult, however Chrome’s JS console will provide pretty good error messaging and will indicate which line of the shader is causing a problem.

Brightness Shader Example

For the first example we will walk through a super simple brightness shader. Slide the slider to change the brightness of the 3D scene.

Shader code can be included in the main JS file or maintained in separate JS files. In this case the shader code is in it’s own file. We can break apart the shader code into 3 sections, the uniforms, the vertex shader and the fragment shader. For this example we can skip the vertex shader since this section remains unchanged for pixel shaders. Three.js shaders require a vertex and fragment shader even if you are only modifying one.

UNIFORMS
The “uniforms” section lists all the inputs from the main JS. Uniforms can change every frame, but remain the same between all processed pixels

uniforms: {
"tDiffuse": { type: "t", value: null },
"amount": { type: "f", value: 0.5 }
},
  • tDiffuse is the texture from the previous shader. This name is always the same for three.js shaders. Type ‘t’ is a texture – essentially a 2D bitmap. tDiffuse is always passed in from the previous shader in the effect chain.
  • amount is a custom uniform defined for this shader. Passed in from the main JS. Type ‘f’ is a float.

FRAGMENT SHADER
The fragmentShader (pixel shader) is where the actual pixel processing occurs. First we define the variables, then we define the main() code loop.

fragmentShader: [

"uniform sampler2D tDiffuse;",
"uniform float amount;",
"varying vec2 vUv;",

"void main() {",
"vec4 color = texture2D(tDiffuse, vUv);",
"gl_FragColor = color*amount;",
"}"

].join("\n")

Here you will notice one of the quirks of shaders in three.js. The shader code is written as a list of strings that are concatenated. This due to the fact that there is no agreed way to load and parse separate GLSL files. It’s not great but you get used to it pretty quick.

  • uniform variables are passed in from main JS. The uniforms listed here must match the uniforms in the uniforms section at the top of the file.
  • varying variables vary for each pixel that is processed. vUv is a 2D vector that contains the UV coordinates of the pixel being processed. UV coords go from 0 to 1. This value is always called vUv and is passed in automatically by three.js

The main() function is the code that runs on each pixel.

  • Line 8 gets the color of this pixel from the passed in texture (tDiffuse) and the coord of this pixel (vUv). vec4 colors are in RGBA format with values from 0 to 1, so (1.0,0.0,0.0,0.5) would be red at 50% opacity.
  • Line 9 sets the gl_FragColor. gl_FragColor is always the output of a pixel shader. This is where you define the color of each output pixel. In this case we simply multiply the actual pixel color by the amount to create a simple brightness effect.

Mirror Shader Example

In addition to modifying the colors of each pixel, you can also copy pixels from one area to another. As in this example Mirror Shader.

For example to copy the left hand side of the screen to the right you can do this:

"uniform sampler2D tDiffuse;",
"varying vec2 vUv;",

"void main() {",
"vec2 p = vUv;",
"if (p.x > 0.5) p.x = 1.0 - p.x;",
"vec4 color = texture2D(tDiffuse, p);",
"gl_FragColor = color;",
"}"

This code checks the x position of each pixel it is run on (p.x). If it’s greater than 0.5 then the pixel is on the right hand side of the screen. In this case, instead of getting the gl_FragColor in the normal way, it gets the pixel color of the pixel at position 1.0 – p.x which is the opposite side of the screen.

More Shaders!

Here’s some examples of some more advanced shaders that I built recently. View the source to see how they work.

BAD TV SHADER:

Simulates a bad TV via horizontal distortion and vertical roll, using Ashima WebGL Noise. Click to randomize uniforms.

[ EDIT: View source code on Github]

badtv 

DOT MATRIX SHADER:

Renders a texture as a grid of dots. The demo then applies a glow pass by blurring and compositing the scene via an Additive Blend Shader.

dotmatrix

PAREIDOLIA:

An audio reactive animation. Post-processing via a combination of mirror, dotscreen shader and RGB shift shaders:

para

Of course this is just scratching the surface of what you can do with shaders, but hopefully it will be enough to get some people started. If you made it this far, congratulations! Let me know how you get on in the comments.

WebCamMesh Demo

See my Experiment on ChromeExperiments.com
WebCamMesh is a HTML5 demo that projects webcam video onto a WebGL 3D Mesh. It creates a ‘fake’ 3D depth map by mapping pixel brightness to mesh vertex Z positions. Perlin noise is used to create the ripple effect by modifying the Z positions based on a 2D noise field. CSS3 filters are used to add contrast and saturation effects.

Running the Demo

Use mouse move to tilt and scroll wheel to zoom. The 3D effect works better if the foreground elements are brighter than the background, so try it in a dark room. Run the demo.

The demo requires a WebGL capable machine and WebCam support. Currently that means Chrome and Opera. On my MacBook Pro I get about 30 FPS with Chrome. If the demo craps out, try resizing your browser down and reloading the page.

[UPDATE] – I added Opera support to the demo. Note that Opera does not support CSS filters so you won’t get the contrast and saturation effects. You may also need to enable WebGL for Opera.

Built With:

To Do:

  • Add Audio reactivity to the mesh from MP3 Web audio API
  • Add Snap shot button. Problem is there is no way to save out the pixels with the CSS filters applied, so I need to re-do the filters with shaders.
  • Add grid resolution slider

Generated Images

Loop Waveform Visualizer

See my Experiment on ChromeExperiments.com
Chrome’s new Web Audio API allows us to do some pretty amazing audio stuff directly in the browser. Specifically the RealtimeAnalyserNode Interface provides real-time frequency and time-domain audio analysis which allows you to display ‘graphic equalizer’ style level bar charts and waveforms of an audio source. Chrome’s drag-and-drop file handling also allows you to drag and play MP3 files from the desktop. This gives a lot of potential to build very cool realtime audio visualizations in the browser, which was previously only possible using Processing or similar.

The Loop Waveform Visualizer uses a combination of level and waveform data to produce a circular audio visualization of any MP3. Use the mouse to tilt and the mousewheel to zoom.

To run this, you need a WebGL capable machine and the latest Chrome. Also be aware that it won’t look as good when running under Windows, since Chrome’s WebGL implementation on Windows does not suport line thickness (among other issues). It works better if you use a track that has a high dynamic range (meaning the volume of the track changes a lot over time).

The current time slice is rendered in the center, then displaced outwards over time. The level determines the brightness, thickness and Z scale of the loops. The Z displacement gives a nice ‘bounce to the beat’ effect. The waveform shape is drawn into the loop which means you can almost ‘see’ the sound. As with most visualizations, there was a lot of parameter tweaking to give a nice feel. I’m very happy with the performance of this piece – on my box it’s stays pretty solid at 60FPS. This is partially due to the fact that no new 3D objects are created over time. The 160 loops are created on initialization, then have their geometry modified each frame.

I have some plans to improve this piece, including adding post-processing effects, volume sensitivity controls, auto camera movement etc. Let me know if you have any more suggestions for improvement in the comments.

Creative Commons audio sample is from “Screw Base” by Beytah. Built with Three.js. Source is accessible from the demo URL.

Stage3D vs WebGL Performance

So you want to build some crazy next-gen 3D graphics in the browser? Right now there are 2 good options available: Flash 11’s Stage3D versus JavaScript’s native WebGL.

Demos and Source Code

To compare the performance of both options I built a couple of simple demos that show 100 semi-transparent cubes with Additive Blending and 2 point lights.The purpose of these demos is to compare 2 equivalent 3D scenes built with the 2 technologies.

If you are getting low frame rates, try reducing the size of the browser window. On the Stage3D demo, check the debug panel DRIV field for if it says “OpenGL” or “Software” (see below for what this means).

Building the Demos

For these demos I used Away3D 4 for Stage3D and Three.js for WebGL.

Away3D 4 is the latest version of the popular Flash 3D engine, built to utilize Stage3D. Away3D has a great online community and a well maintained set of API docs. Away3D 4 is currently in alpha and some features are missing, for example there is no Particle System object and the filters/shaders support is pretty limited. Use this tutorial to get started with Away3D 4.

Three.js is an open source WebGL 3D engine that has an energetic community who are constantly adding new features. There are plenty of tutorials showing how to get started with Three.js.

Code Comparison

Away3D and Three.js have very similar logical models and syntax. For example to create a Cube in Away3D, you do this:

var cube:Cube = new Cube(material, 100,100,100); 
view.scene.addChild(cube); 

To do the same in Three.js, you do this:

var geometry = new THREE.CubeGeometry(100, 100, 100); 
var cube = new THREE.Mesh(geometry, material); 
scene.add(cube); 

Supported Platforms

To run with hardware acceleration, Stage3D requires Flash 11 and a recent graphics card. If Stage3D cannot use hardware rendering it will fall back to software rendering which is around 5-10 times slower. For a list of Stage3D unsupported GPUs, check here. You can manually detect for software rendering mode, and handle it appropriately. Stage3D uses OpenGL on Mac and DirectX on Windows. The big advantage for Stage3D is that it will run in IE.

WebGL requires no plugins and is currently supported in Chrome, Firefox, Safari and Opera. (But not IE – cheers Microsoft!). WebGL in Chrome on Windows uses ANGLE which converts WebGL to DirectX and gives good performance.

On the Mac, both Stage3D and WebGL translate to OpenGL, so there is not much difference in performance. Neither options currently run on mobile devices (iOS / Android), however both are expected to in the future.

Performance Comparison

I tested the 2 demos on a MacBook Pro (with an NVIDIA GeForce GT 330M) and a mid-range Windows 7 Dell laptop (with integrated Intel(R) HD Graphics). Your mileage will vary.

Stage3D WebGL
Mac / Chrome 60 FPS (OpenGL) 60 FPS
Mac / Firefox 60 FPS (OpenGL) 60 FPS
Mac / Safari 60 FPS (OpenGL) 60 FPS
Windows / Chrome 8 FPS (Software) 50 FPS
Windows / Firefox 8 FPS (Software) Does not run
Windows / IE 12 FPS (Software) Does not run


On the Mac, Stage3D and WebGL both perform well. On Windows, Stage3D performs well if you have supported hardware, otherwise poorly. On Windows, WebGL performs well in Chrome, otherwise it does not run. It’s interesting that Windows / Chrome with WebGL gives good performance even with an integrated GPU.

On the Mac, the Stage3D demo is slower to initialize and the frame-rate has more stutters than the WebGL equivalent. Stage3D gives more interesting color blending and specular highlights.

Summary

Stage3D and WebGL are both great technologies for delivering interactive 3D content in the browser. Away3D and Three.js provide surprisingly similar APIs for developing 3D content.

When the hardware supports it, both options give great performance. Unfortunately neither option runs well across the most common hardware configurations. If you want to target the general population, you will need to provide alternative content for non-supported machines.

Stage3D’s software mode is a nice idea, in that it will show 3D content on unsupported machines. The problem is that the performance is unusably slow. Is it better to show something that performs badly, or to redirect to alternative content?

Since Chrome is a free install on Mac and Windows, you could argue that using WebGL gives a broader reach with decent performance. Perhaps we will start seeing more ‘View this site in Chrome’ banners?

Want more stuff like this? Follow me on Twitter.

UPDATE – There are many comments reporting 60FPS with Windows/Stage3D. The numbers above do not claim to represent a broad range of machine configurations, just what I observed on the 2 machines closest to me. My test PC laptop has an integrated GPU and therefore does not support Stage3D hardware mode. It is a mid-range laptop, less than 6 months old and as such is probably a good indication of where the general public is at.

UPDATE 2 – I’ve updated the demos to allow you to add more cubes, so please go crazy with 1000s of cubes! I also added a mouse look and updated Three.js to r46. On my MBP, WebGL handles 1000 cubes a lot better than Stage3D.

Rutt-Etra-Izer

See my Experiment on ChromeExperiments.com Rutt-Etra-Izer is a WebGL emulation of the classic Rutt-Etra video synthesizer. This demo replicates the Z-displacement, scanned-line look of the original, but does not attempt to replicate it’s full feature set.

The demo allows you to drag and drop your own images, manipulate them and save the output. Images are generated by scanning the pixels of the input image from top to bottom, with scan-line separated by the ‘Line Separation’ amount. For each line generated, the z-position of the vertices is dependent on the brightness of the pixels.

View Demo | Download Source

Running the Demo

To run the demo you need the latest version of Chrome or Firefox, and a fairly new machine. Check if your browser supports WebGL here. If it’s still not working, try restarting your browser.

If you are experiencing slow performance, there are a few things to try: 

  • Reduce stage size
  • Increase line separation
  • Reduce input image size

Generated Output

You can view more images generated by this demo in this Flickr set.

I also built an audio-reactive version with Processing . View a video of this in action below:

VAC / Rutt-Etra-Izer™ from felixturner on Vimeo.

More About Rutt-Etra

The Rutt-Etra video synthesizer was built by Steve Rutt and Bill Etra in 1972. It was one of the first devices to allow real-time manipulation of live video and helped instigate the video art movement of the 1970s. Unfortunately Steve Rutt recently passed away. His pioneering contributions to the field of video art will be always be remembered.

Anton Marini (Vade) created a fantastic Rutt-Etra Emulator for Quartz Composer. The source code of this demo is inspired by Andy Best’s 3D Web Cam Lines processing experiment.

Credits

UPDATE (June 13): It appears that saving images from WebGL is broken in Chrome 12. I’m looking into possible solutions. In the meantime, you can use Firefox instead.

UPDATE (June 14): Saving images in now fixed in Chrome 12. The solution is to call a render() immediately before calling toDataURL(). Thanks again to AlteredQualia and Mr.doob.