Category Archives: Photography

SimpleViewer v1.8.5 Released

SV grab

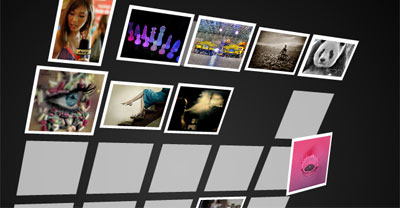
When I first created SimpleViewer back in 2003, it was mainly a reaction against the multitude of bad web photo galleries that were out there. The idea was to create a gallery that was simple, unobtrusive and usable. I did not expect 5 years later that it would be getting over 15,000 downloads a week!.

This popularity has spurred me to keep improving the gallery. The 1.8.5 updates include:

  • Added full localization support
  • Allow direct links to images within gallery
  • Added PNG and GIF support (publishing to Flash 8 )
  • Added 3 new XML options: vAlign, hAlign, navPadding. These improve layout for small format galleries.
  • Added 5 new Pro AS options: showCaptionOnRollover, captionUnderThumbs, captionFontSize, titleFontSize, captionPadding
  • Allow setting caption and title colors via HTML font tags

As usual, these new features are mainly based on the awesome feedback that comes from the forums. Unfortunately due to the high volume of posts I do not have time to answer each one, but I do read every post and take note of the issues raised.

SimpleViewer-Pro customers are notified via email when there is an update. All 1.x updates are provided free of charge.

Please download the latest version, give it a whirl and let me know if you see any bugs. Thanks!

AutoViewer Update

I’ve spruced up AutoViewer a little as part of my spring cleaning. The biggest change is that captions now support HTML formatting, including hyperlinks. The UI was tweaked to be more useful in small format situations (see example below). Also added localization support and some new config options. See a list of all the changes here. Most of the new features are based on feedback posted to the autoviewer forum.

AutoViewer-Pro customers are notified via email when there is an update. All 1.x updates are provided free of charge.

[kml_flashembed movie=”http://www.airtightinteractive.com/projects/autoviewer/examples/small/autoviewer.swf” width=”400″ height=”300″ fversion=”8″ bgcolor=”#000000″ fvars=” xmlURL= http://www.airtightinteractive.com/projects/autoviewer/examples/small/gallery.xml”/]

TiltViewer Update

tilt grab

I just posted an update to TiltViewer. The main difference is that there is now a free version you can download and use on your own website.

The list of updates is listed here. Many of these updates are based on the great feedback that is posted in the TiltViewer-Pro forum.

TiltViewer-Pro customers are notified via email when there is an update. All 1.x updates are provided free of charge.

Introducing svManager, the Easy Way to Manage your SimpleViewer Galleries

svManager provides a user interface for managing SimpleViewer galleries via a PHP application that runs on your webserver. svManager can be used with the free version of SimpleViewer or with SimpleViewer-Pro. Find out more about svManager here.

Thanks to Jack Hardie for doing a stellar job putting svManager together.

TiltViewer – A 3D Flickr Image Browser

TiltViewer

TiltViewer allows you to browse Flickr’s most interesting images in a 3D space. Images are pulled from Flickr’s Interestingness list.

TiltViewer was built using Away3D, a branch of Papervision. Currently Away3D provides better handling of mouse events for nested 3D Objects. One limitation of Away3D is that there is no access to a 3D object’s sprite, so you can’t apply filter or alpha effects. I’m guessing that soon these features will be added to both engines.

Does a 3D UI give more functionality than the equivalent 2D interface? No, but its certainly a lot cooler! Part of the motivation to build this was to explore ways to make 3D interfaces simple and intuitive.

Being able to load Flickr images into a 3D engine was recently made possible when Flickr added crossdomain XMLs to it’s image servers. Thanks Flickr!

Click here for more about TiltViewer.

Slower Photo Tweaking Action

Image by Eliot Shephard

Eliot Shephard is one of the best photographers out there. His groundbreaking photoblog Slower.net is a collection of all the crazy stuff he sees in New York and elsewhere.

Eliot was kind enough to share with me (and you) one of his Photoshop actions for processing digital photos. This action walks you through the most important steps for processing your images, allowing you to tweak the settings as you go. None of this stuff will be news to Photoshop experts, but newbies (like me) should find it very helpful.

To install the action: Download this file to your desktop. Open Photoshop. Drag the file into Photoshop’s action palette.

To use the action: Open an image in Photoshop. Select the ‘Slower Photo Tweak’ action in the action palette. Click the little arrow at bottom of the palette to start the action.

Notice the checkmarks and dotted boxes to the left of each step. An unchecked step will be skipped. The dotted box represents a dialog box. If the box is there it means Photoshop will ask you to tweak the settings for that step. The default settings here mostly have no effect, the idea is that you eyeball the settings for each step.

The steps are as follows:

  1. Shadows/Highlights. A small percentage here can bring out detail in a dark or overexposed photo.
  2. Curves. A slight ‘S’ curve will increase the lighting drama (for example in clouds).
  3. Image/Canvas Resize
  4. Levels. To increase ‘crushiness’/contrast, drag in the white arrow to the left of the black mountain. Drag the grey arrow around to lighten or darken the image.
  5. Saturation. A slight negative saturation gives that de-saturated look that is all the rage.
  6. Unsharp Mask. This step applies an unsharp mask on the lightness channel, which gives a very nice, subtle sharpening to the image. The default here is good.
  7. Save. Saves your modified image in a new location. To set the default path for your saves, double-click the path in the action.

When you first start processing your photos, the temptation is to overdo the effects, making everything look like a still from the movie “300“. Once you become familiar with the options available and can recognize the effects in other images, you will find that the key is adding just enough of a tweak to bring out the image’s natural qualities.

Thanks to Eliot for providing this, and if anyone has suggestions to improve the action, let me know in the comments.