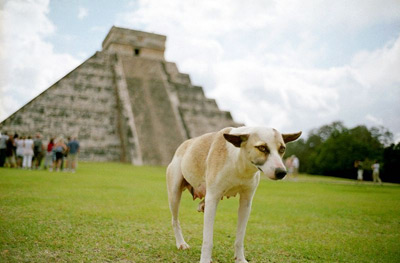
Eliot Shephard is one of the best photographers out there. His groundbreaking photoblog Slower.net is a collection of all the crazy stuff he sees in New York and elsewhere.
Eliot was kind enough to share with me (and you) one of his Photoshop actions for processing digital photos. This action walks you through the most important steps for processing your images, allowing you to tweak the settings as you go. None of this stuff will be news to Photoshop experts, but newbies (like me) should find it very helpful.
To install the action: Download this file to your desktop. Open Photoshop. Drag the file into Photoshop’s action palette.
To use the action: Open an image in Photoshop. Select the ‘Slower Photo Tweak’ action in the action palette. Click the little arrow at bottom of the palette to start the action.
Notice the checkmarks and dotted boxes to the left of each step. An unchecked step will be skipped. The dotted box represents a dialog box. If the box is there it means Photoshop will ask you to tweak the settings for that step. The default settings here mostly have no effect, the idea is that you eyeball the settings for each step.
The steps are as follows:
- Shadows/Highlights. A small percentage here can bring out detail in a dark or overexposed photo.
- Curves. A slight ‘S’ curve will increase the lighting drama (for example in clouds).
- Image/Canvas Resize
- Levels. To increase ‘crushiness’/contrast, drag in the white arrow to the left of the black mountain. Drag the grey arrow around to lighten or darken the image.
- Saturation. A slight negative saturation gives that de-saturated look that is all the rage.
- Unsharp Mask. This step applies an unsharp mask on the lightness channel, which gives a very nice, subtle sharpening to the image. The default here is good.
- Save. Saves your modified image in a new location. To set the default path for your saves, double-click the path in the action.
When you first start processing your photos, the temptation is to overdo the effects, making everything look like a still from the movie “300“. Once you become familiar with the options available and can recognize the effects in other images, you will find that the key is adding just enough of a tweak to bring out the image’s natural qualities.
Thanks to Eliot for providing this, and if anyone has suggestions to improve the action, let me know in the comments.

 Latest Tweets
Thanks so much for sharing.
you have no idea how long I’ve been trying to achieve similar results… this is great!
Hi, nice and useful stuff.. Just have to remember that it’s so easy to overdo things!
Anyway, I’d like to share one of my tricks to enhance any image.
This following method gives a bit of punch to any picture, trust me!
You would propably apply this method after doing most of your basic enhancement stuff..
1. Go to you “channels” window.
2. Control+click on the rgb channel, this will choose all the image data that is darker than gray… (Sorry but this is the easiest way to explain it)
3. go back to your layers window
4. select inverse (thus selecting the lighter part of the image)
5. ctrl+j will “create a new layer via copy” (or you can simply choose it from the “layer/new/layer via copy” pull down menu.
6. select the new layer’s blending mode as “soft light”
7. Start playing with the opacity. I would suggest starting from somewhere like 25% opacity.
8. Congratualtions! Your image just got a lot punchier….
Try it, and you’ll never want to stop using this method…
I would like to see a photo using those effects… can anyone share? Thanks 😉
Do you prefer canned ham to freshly cooked bacon? These “one size fits all actions” are strictly for novices.
Doug Dolde
http://www.painted-with-light.com
Doug, sorry but your imagery is too “punched” for me.
Too much saturation, which is not fresh cooked bacon.
cool !
hey Ikka. love it! works great
[…] for processing digital photos. (tags: photography photoshop photo Plugin) Read More Post acomment […]
[…] Airtight News » Slower Photo Tweaking Action (tags: photoshop photography Plugin) Categories: Links […]
i’m a vegetarian. i like making photographs though.
Thanks so much for sharing, works great
[…] http://www.airtightinteractive.com/news/?p=84#comments […]
Great! Awesome photo! 🙂
hey! the link is broken. reupload pleaseee!!!!
thank you
i can’t download anything its not working at alll
Great! Awesome photo