I recently started playing with shaders in three.js and I wanted to share some of what I’ve discovered so far. Shaders are the ‘secret sauce’ of modern graphics programming and understanding them gives you a lot of extra graphical fire-power.
For me the big obstacle to learning shaders was the lack of documentation or simple examples, so hopefully this post will be useful to others starting out. This post will focus on using pixel shaders to add post-processing effects to Three.js scenes. This post assumes you already know the basics of using Three.js.
What is a Shader?
A Shader is a piece of code that runs directly on the GPU. Most modern devices have powerful GPUs designed to handle graphics effects without taxing the CPU. This means you get a lot of graphical power essentially for free.
The big conceptual shift when considering shaders is that they run in parallel. Instead of looping sequentially through each pixel one-by-one, shaders are applied to each pixel simultaneously, thus taking advantage of the parallel architecture of the GPU.
There are 2 main types of shaders – vertex shaders and pixel shaders.
- Vertex Shaders generate or modify 3D geometry by manipulating its vertices. A good example is this fireball where the vertex positions of a sphere geometry are deformed by perlin noise.
- Pixel Shaders (or ‘Fragment Shaders’) modify or draw the pixels in a scene. They are used to render a 3D scene into pixels (rasterization), and also typically used to add lighting and other effects to a 3D scene.
There are 2 different kinds of pixel shaders –
- Shaders that draw an image or texture directly. These allows you to draw the kind of abstract patterns seen on glsl.heroku.com. These types of shaders can be loaded into a THREE.ShaderMaterial to give cool textures to 3D objects like this example.
- Shaders that modify another image or texture. These allow you to do post-processing on an existing texture, for example to add a glow or blur to a 3D scene. This second type of shader is what we will be talking about for the remainder of this post.
Pixel Shaders in Three.js
Three.js has an effects manager called EffectsComposer and many useful shaders built in. This code is not compiled into the main Three.js file, rather it is maintained separately in 2 folders in the three.js root folder:
- /examples/js/postprocessing – contains the main EffectsComposer() class, and a number of ShaderPasses.
- /examples/js/shaders – contains multiple individual shaders.
Unfortunately these shaders are not very well documented, so you need to dig in and test them out yourself.
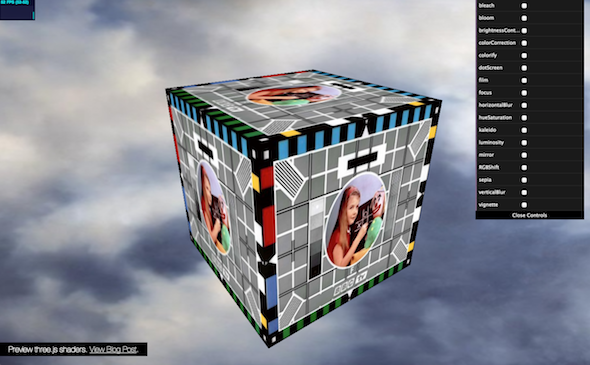
Preview some of the three.js built-in shaders with this demo.
Applying Shaders in Three.js
Applying a shader is pretty straight-forward. This example applies a dot screen and RGB shift effect to a simple 3D scene:
To use shaders that come with three.js, first we need to include the required shader JS files. Then in the scene initialization we set up the effect chain:
// postprocessing
composer = new THREE.EffectComposer( renderer );
composer.addPass( new THREE.RenderPass( scene, camera ) );

var dotScreenEffect = new THREE.ShaderPass( THREE.DotScreenShader );
dotScreenEffect.uniforms[ 'scale' ].value = 4;
composer.addPass( dotScreenEffect );

var rgbEffect = new THREE.ShaderPass( THREE.RGBShiftShader );
rgbEffect.uniforms[ 'amount' ].value = 0.0015;
rgbEffect.renderToScreen = true;
composer.addPass( rgbEffect );
First we create an EffectComposer() instance. The effect composer is used to chain together multiple shader passes by calling addPass(). Each Shader Pass applies a different effect to the scene. Order is important as each pass effects the output of the pass before. The first pass is typically the RenderPass(), which renders the 3D scene into the effect chain.
To create a shader pass we either create a ShaderPass() passing in a shader from the ‘shaders’ folder, or we can use some of the pre-built passes from the ‘postprocessing’ folder, such as BloomPass. Each Shader has a number of uniforms which are the input parameters to the shader and define the appearance of the pass. A uniform can be updated every frame, however it remains uniform across all the pixels in the pass. Browse which uniforms are available by viewing the shader JS file.
The last pass in the composer chain needs to be set to to renderToScreen. Then in the render loop, instead of calling renderer.render() you call composer.render()
That’s all you need to apply existing effects. If you want to build your own effects, continue.
GLSL Syntax
WebGL shaders are written in GLSL. The best intro to GLSL syntax I found is at Toby Schachman’s Pixel Shaders interactive tutorial. Go thru this quick tutorial first and you should get a lightbulb appearing over your head. Next take a look at the examples in his example gallery. You can live edit the code to see changes.
GLSL is written in C so get out your ‘Kernighan and Ritchie’ :). Luckily a little code goes a long way so you won’t need to write anything too verbose. The main WebGL language docs are the GLSL ES Reference Pages, which lists all the available functions. GLSL Data Types are described here. Usually Googling ‘GLSL’ and your query will give you good results.
Some GLSL Notes:
- Floats always need a number after the decimal point so 1 is written as 1.0
- GLSL has many useful utility functions built in such as mix() for linear interpolation and clamp() to constrain a value.
- GLSL allows access to components of vectors using the letters x,y,z,w and r,g,b,a. So for a 2D coordinate vec2 you can use pos.x, pos.y. For a vec4 color you can use col.r, col.g,col.b,col.a
- Most GLSL functions can handle with multiple input types e.g. float, vec2, vec3 and vec4.
- Debugging GLSL is notoriously difficult, however Chrome’s JS console will provide pretty good error messaging and will indicate which line of the shader is causing a problem.
Brightness Shader Example
For the first example we will walk through a super simple brightness shader. Slide the slider to change the brightness of the 3D scene.
Shader code can be included in the main JS file or maintained in separate JS files. In this case the shader code is in it’s own file. We can break apart the shader code into 3 sections, the uniforms, the vertex shader and the fragment shader. For this example we can skip the vertex shader since this section remains unchanged for pixel shaders. Three.js shaders require a vertex and fragment shader even if you are only modifying one.
UNIFORMS
The “uniforms” section lists all the inputs from the main JS. Uniforms can change every frame, but remain the same between all processed pixels
uniforms: {
"tDiffuse": { type: "t", value: null },
"amount": { type: "f", value: 0.5 }
},
- tDiffuse is the texture from the previous shader. This name is always the same for three.js shaders. Type ‘t’ is a texture – essentially a 2D bitmap. tDiffuse is always passed in from the previous shader in the effect chain.
- amount is a custom uniform defined for this shader. Passed in from the main JS. Type ‘f’ is a float.
FRAGMENT SHADER
The fragmentShader (pixel shader) is where the actual pixel processing occurs. First we define the variables, then we define the main() code loop.
fragmentShader: [

"uniform sampler2D tDiffuse;",
"uniform float amount;",
"varying vec2 vUv;",

"void main() {",
"vec4 color = texture2D(tDiffuse, vUv);",
"gl_FragColor = color*amount;",
"}"

].join("\n")
Here you will notice one of the quirks of shaders in three.js. The shader code is written as a list of strings that are concatenated. This due to the fact that there is no agreed way to load and parse separate GLSL files. It’s not great but you get used to it pretty quick.
- uniform variables are passed in from main JS. The uniforms listed here must match the uniforms in the uniforms section at the top of the file.
- varying variables vary for each pixel that is processed. vUv is a 2D vector that contains the UV coordinates of the pixel being processed. UV coords go from 0 to 1. This value is always called vUv and is passed in automatically by three.js
The main() function is the code that runs on each pixel.
- Line 8 gets the color of this pixel from the passed in texture (tDiffuse) and the coord of this pixel (vUv). vec4 colors are in RGBA format with values from 0 to 1, so (1.0,0.0,0.0,0.5) would be red at 50% opacity.
- Line 9 sets the gl_FragColor. gl_FragColor is always the output of a pixel shader. This is where you define the color of each output pixel. In this case we simply multiply the actual pixel color by the amount to create a simple brightness effect.
Mirror Shader Example
In addition to modifying the colors of each pixel, you can also copy pixels from one area to another. As in this example Mirror Shader.
For example to copy the left hand side of the screen to the right you can do this:
"uniform sampler2D tDiffuse;",
"varying vec2 vUv;",

"void main() {",
"vec2 p = vUv;",
"if (p.x > 0.5) p.x = 1.0 - p.x;",
"vec4 color = texture2D(tDiffuse, p);",
"gl_FragColor = color;",
"}"
This code checks the x position of each pixel it is run on (p.x). If it’s greater than 0.5 then the pixel is on the right hand side of the screen. In this case, instead of getting the gl_FragColor in the normal way, it gets the pixel color of the pixel at position 1.0 – p.x which is the opposite side of the screen.
More Shaders!
Here’s some examples of some more advanced shaders that I built recently. View the source to see how they work.
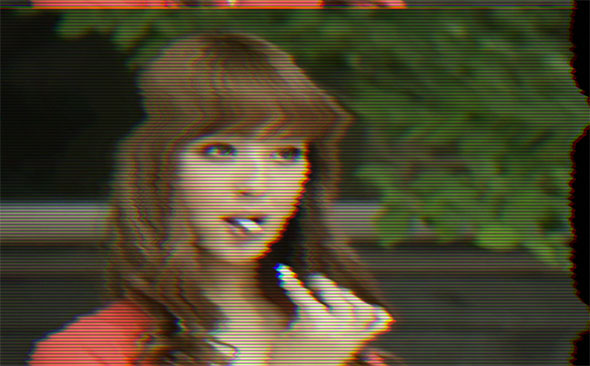
BAD TV SHADER:
Simulates a bad TV via horizontal distortion and vertical roll, using Ashima WebGL Noise. Click to randomize uniforms.
[ EDIT: View source code on Github]
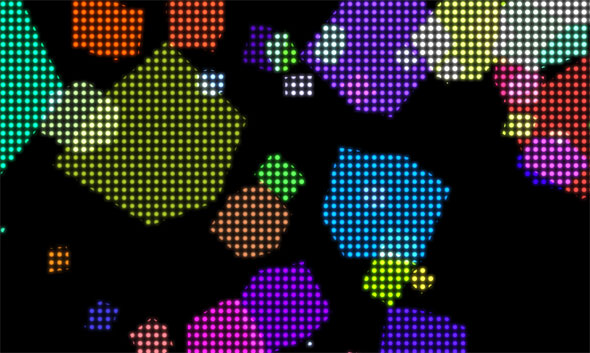
DOT MATRIX SHADER:
Renders a texture as a grid of dots. The demo then applies a glow pass by blurring and compositing the scene via an Additive Blend Shader.
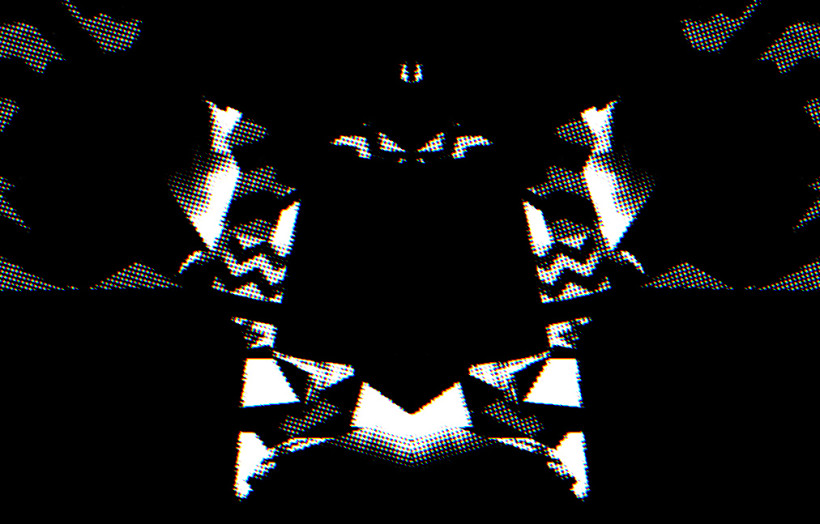
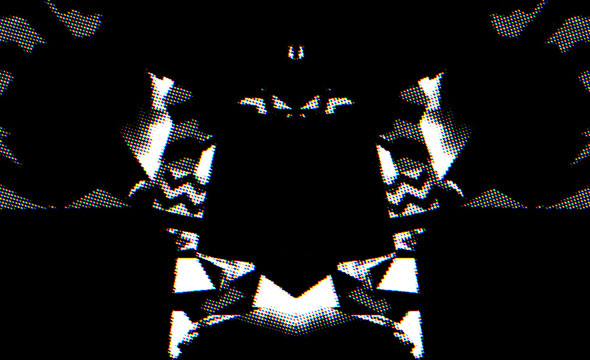
PAREIDOLIA:
An audio reactive animation. Post-processing via a combination of mirror, dotscreen shader and RGB shift shaders:
Of course this is just scratching the surface of what you can do with shaders, but hopefully it will be enough to get some people started. If you made it this far, congratulations! Let me know how you get on in the comments.
 Latest Tweets
Just spent a while digging into pixel shaders and this was really helpful. Thanks 🙂
[…] wont see nothing rendered! If you want to know more about the effect composer there is a great post here by Felix […]
Unfortunately your examples aren’t working 🙁 – I hope you fix it!
Fixed!
very good intro
a great smooth , enter to the world of shaders
thanks alot for a great article
hey,
never took the time to mention that this post is epic.
fixed.
very good article ( as always )
thank you for sharing 🙂
Seconded, an epic post indeed. Cuts right to the important stuff! Because honestly, anybody who is Googling “three.js shaders postprocessing” clearly already has some idea about what a shader does, and they just want to see a gosh-durned contextual example so they can get down to the good stuff and start BLiTtin’ their friggin hearts out in a web browser –yeeeehaw. This ain’t your pappy’s Gopher.
Just started reading your stuff. Looks awesome and seems promissing with all the ezamples and the over all openess…
Any wanted to let you know that the link above is broken:
http://mrdoob.github.io/three.js/docs/55/#Manual/Introduction/Creating_a_scene
“the basics of using Three.js.”
[…] Intro to Pixel Shaders in Three.js, written by Felix Turner […]
It seems that it is not that simple. I tryed your example but had to do a lot more than
adding a composer and the effects. It seems to be important to add
var effectFXAA = new THREE.ShaderPass( THREE.FXAAShader );
effectFXAA.uniforms[ ‘resolution’ ].value.set( 1 / window.innerWidth, 1 / window.innerHeight );
effectFXAA.renderToScreen = true;
else the screen stays black (or white 😉 ).
But thanks a lot for the introduction!
ALSO it is necessary to add the MaskPass!
Without this its also not working.
It is tricky but very very easier than writing it all by yourself.
[…] 介紹 three.js 中引用 shader 的方式 […]
Thank you very much for this. Best resource I’ve found for intro to shaders. Most intros focus too heavily on the pipeline but you have a good balance.
To those who have tried this code and gotten errors: THREE.js changes constantly. I had to include several more scripts in the postprocessing folder to make this work. Specifically:
– /shaders/CopyShader.js
– /postprocessing/RenderPass.js
– /postprocessing/MaskPass.js
– /postprocessing/ShaderPass.js
I also had to edit line 13 of EffectComposer.js from:
var parameters = { minFilter: THREE.LinearFilter, magFilter: THREE.LinearFilter, format: THREE.RGBFormat, stencilBuffer: false };to:
var parameters = { minFilter: THREE.LinearFilter, magFilter: THREE.LinearFilter, format: THREE.ARGBFormat, stencilBuffer: false };Iam trying to use the same effectcomposer example but still getting black screen. The following lines does not work properly
effectFXAA.uniforms[ ‘resolution’ ].value.set( 1 / window.innerWidth, 1 / window.innerHeight ); No such “resolution” parameter is available
This may be slightly off topic but I’m trying to get this demo working locally with the latest threed.js (V73) but the cubes don’t move and I can’t figure out why. It might be something to do with the references of the Box object losing values somehow, but I’m really not sure. any ideas?